What You Should Know About Online AP® Classes
by Julie Hersum
byElizabeth Preston
6 min to readDo you diligently take notes in class but find they are little help when studying for a test? Or do you take very few notes because you’re not sure how or even why they’re so important?
Here are some tips and some of the best note-taking techniques to help you (or your student) become a master note-taker—whether you favor pen and paper or computer. Let’s start with the following:
Taking great notes is about helping you to get organized, stay focused, remember key points, and study effectively for tests. It’s not about recording every word a teacher says or everything an expert writes. If you try that, you’ll be more focused on taking notes than on understanding the material.
Here are some note-taking tips for high school and middle school students to make note-taking as pain-free and productive as possible.
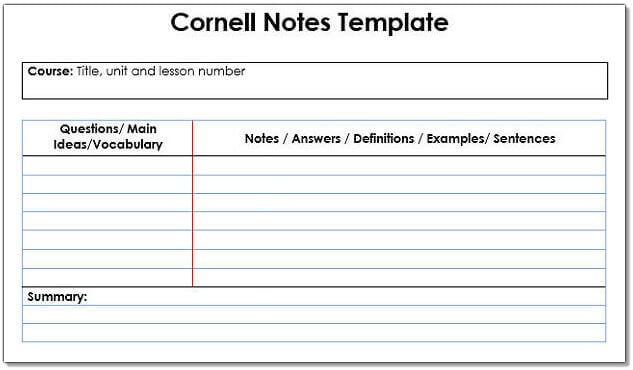
People have different learning styles and different preferences for taking notes. So, students need to find the method or combination of methods that works best for them. Here are three of the most effective methods to take notes as well as some downloadable templates and examples.

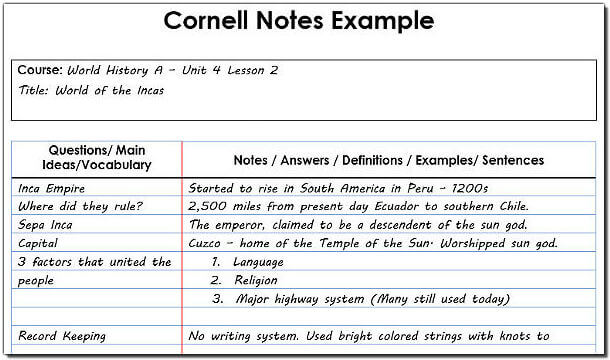
When you’re finished, your notes should look similar to this:

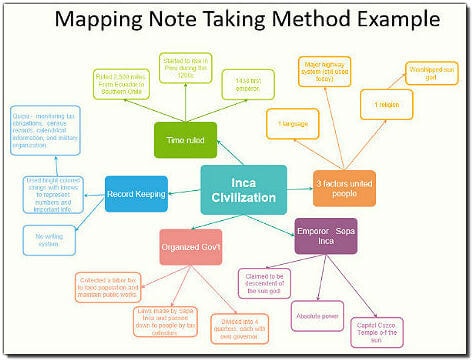
If you’re more of a visual learner, then the mapping method may be right for you since it relies on graphics and structures to connect key ideas. In this method you:
When you’re finished, it should look something like the example below from a lesson on the Inca civilization. You can also use color-coding to distinguish between types of information such as dates, people, examples, definitions, or theories.
Even if you don’t wish to use the mapping method for note-taking, you may want to try it as a study aid. For example, after reading a chapter, close your book and map out the main ideas and supporting details you can recall. It’s more fun than writing a summary, and the process helps dislodge information lurking in the back of your memory.
The mapping method is also a great way to start brainstorming and organizing essays as well as breaking through writer’s block.

If you like a highly structured approach or you’re already skilled at outlining, then the outline/bullet method may be ideal for you. This is a particularly effective note-taking technique for those who think linearly and are detail-oriented.
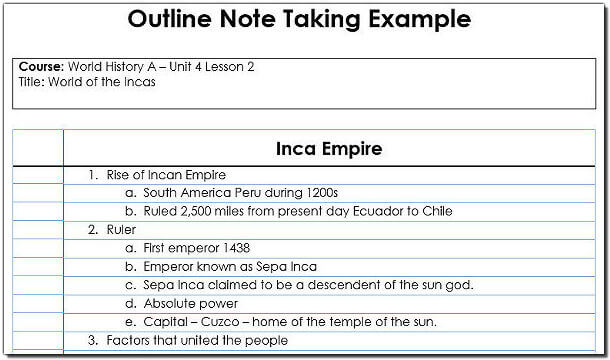
Using indents, numbers and letters, or indents and bullets, this note-taking method organizes your notes in a logical, easy-to-scan hierarchy. With the outline method, you:
When you’re done, your notes should look something like this:

If you don’t want to bother with numbers and letters, then follow the same format and just substitute bullets for any numbers or letters.
What makes the outline method an effective note-taking technique is its ability to be customized to the student and how easily it lends itself to organizing one’s thoughts.
Whether you choose one note-taking method or a combination of the three note-taking methods, it’s important to remember that each needs to be practiced and individualized to each student. With some time and effort, though, you will be able to find the best note-taking method for you.
by Julie Hersum
by Trey Edgington
by Charlotte Davies
