What Do Kids Want to Be When They Grow Up?
by Dirk Lester
5 min to read
Home-based science experiments with the kids can be a blast thanks to the excitement and joy these hands-on experiences can offer. But instead of leaving your scientific sessions with only a mess and a fond memory, help your students learn lessons they may remember for years to come.
Here are four fun, easy experiments you can turn into at-home science lessons without much extra effort or material—along with instructions on exactly how to do so.
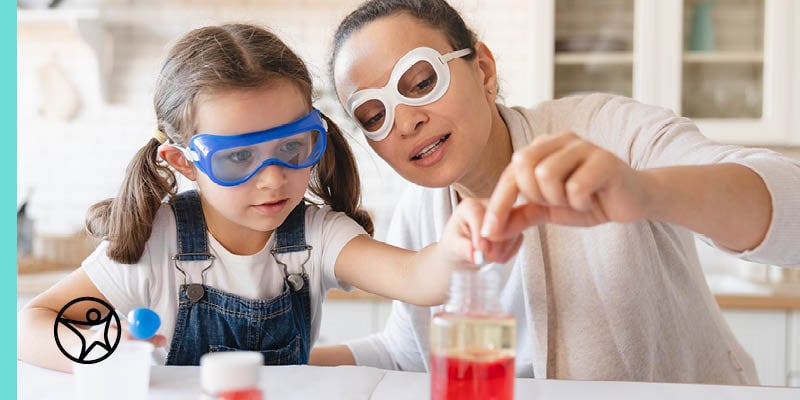
Your elementary schooler can use this simple exercise to see how different liquids don’t always mix due to their different densities.
Students who take part in making a density display might be more likely to understand the relationship between mass (how much) and density (how tightly packed). Out of all potential science lessons in the kitchen, this is arguably one of the coolest to look at as well as the easiest to put together.
Show your learners how the different liquids around the house make visible layers when poured into the same container. To run this experiment, let your student choose from an array of common household items (we recommend at least 3 to really see the effect).
You can use anything with different densities, such as:
Find a tall glass or clear bowl and gather your ingredients.
Before your student adds any ingredients, ask them what they think will happen. Help them form a hypothesis and write it down so you can help them keep track of their findings.
Then, help them carefully pour even amounts of each of their chosen liquids, starting with the highest-density substances and ending with whatever has the lowest density.
In the realm of home-based science experiments, one of the simplest, most fascinating activities is regrowing a green onion in water. All you need is a green onion, a clear glass or jar, and fresh water.
The procedure is straightforward: Cut the bottom of the green onion, leaving about an inch of the bulb with the roots. Place this in a glass or jar with just enough water to cover the roots but not submerge the entire bulb. The jar should be left in a spot that gets plenty of sunlight.
Your little botanist should see the start of new growth within a couple hours, but for the next seven to ten days, budding scientists can engage in daily observations, tracking the onion's progress with a ruler as new green shoots start to emerge and eventually regrow to their original size. It's crucial to change the water every two days to prevent bacterial growth and ensure the onion's healthy development.
This experiment serves multiple learning objectives. It demonstrates a key concept in botany, plant regeneration, showcasing the marvel of life sciences. It instills the principles of sustainability and waste reduction by showing how food scraps can be reused. It encourages many students to take an interest in gardening and plant health. Finally, it hones students' observation and documentation skills, encouraging them to record the changes they see each day, practicing key aspects of the scientific method.
The lesson here is that chemicals can react to one another in surprising ways. This experiment will teach your learner first how these specific substances react to one another, but more importantly, that mixing two or more chemicals can change the size, shape, and consistency of those chemicals.
The bonus here is that once you’re done, you can safely play with the foam while you talk about what was learned.
To get started, grab:
What you’ll end up with once you mix these ingredients is a reaction that looks very much like toothpaste — in quantities big enough for an elephant!Pour half a cup of the hydrogen peroxide into the bottle, then add a hefty squeeze worth of dish soap. Swirl and add a few drops of food coloring to make the color and pattern you want. In a separate container, mix your yeast and warm water together, stir for roughly thirty seconds, then pour the result into the bottle with the other ingredients. Stand back and wait for the “oohs” and “ahhs.” Try this method in the backyard or in the bathtub for easy cleanup.
In this experiment, the objective is to help kids understand how natural water filtration works by creating homemade water filters. You’ll need:
Set the three funnels over their own respective containers.
You should notice the clarity of the water that comes out of each filter. Which material did the best job of filtering out the dirt? How clear is the water compared to when you started?
Once you and your little learner finish observing, you can discuss how this simple experiment replicates what happens in nature as water passes through different layers of soil, sand, and rock in the ground, getting naturally filtered before it ends up in our aquifers. This topic can even lead to a larger discussion about the importance of clean water and the methods we use to achieve it.
If you want to stay an active part of your student’s education while they attend a high-quality public school, explore the Connections Academy Resource Hub or request more information today. We’re here to help students thrive in their education, including at-home science lessons they could be talking about for years to come.

About Connections Academy?
Explore the benefits of attending Connections Academy, a tuition-free, accredited online public school that’s passionate about helping your child thrive.


